
Tuesday, April 22, 2014

Wednesday, April 9, 2014
Coming Soon...
I know it looks like I've neglected our little corner of the internet. However, quite the opposite has happened. Those haven't been crickets you're hearing; that's the buzzing of worker bees! Sieb Fam has been under some major construction and is getting a lovely little make-over.
Now I'm itching to show it off, but there's still some more fixing up to do. But it's coming. Soon! And for the unveiling there will be a give-away to kick it off...wait for it...wait for it...
Tuesday, March 18, 2014
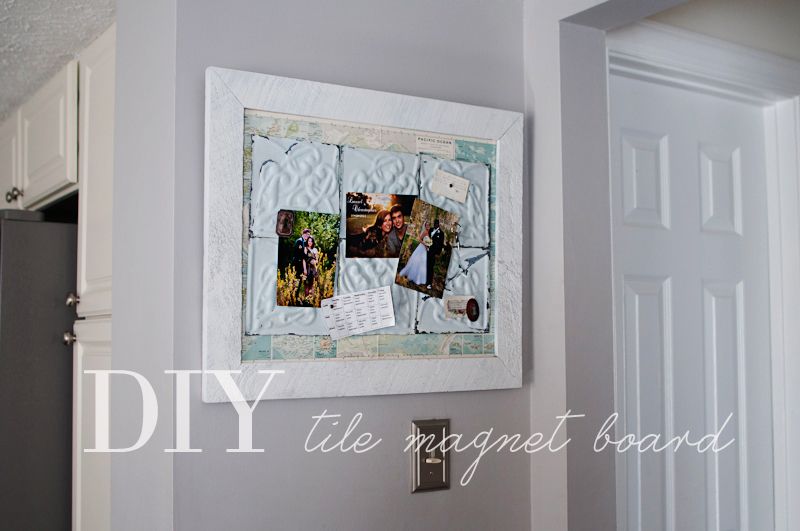
Ceiling Tile Magnet Board {DIY}
I had a DIY planned for today (check out last week's curtain rod upgrade), and I'll be sticking to that plan. Because if I veered off right now this would be a post on three-year-olds who use Sharpies to decorate and who cut their sweet little baby hair three...yes THREEEEEE times in one week!!
*Deep breath*
Okay, just to clarify this DIY will have nothing to do with Sharpies. Instead, let's focus on all thing white and pretty and mappy (we'll pretend that's a word).
Ready to do this? Here's what you'll need:
-a large frame complete with backing
-tin ceiling tiles (I got my antique ones off ebay for a reasonable price. Check HERE for some that are being sold right now.)
-a map or pages out of an atlas
-a very strong adhesive such as Gorilla glue
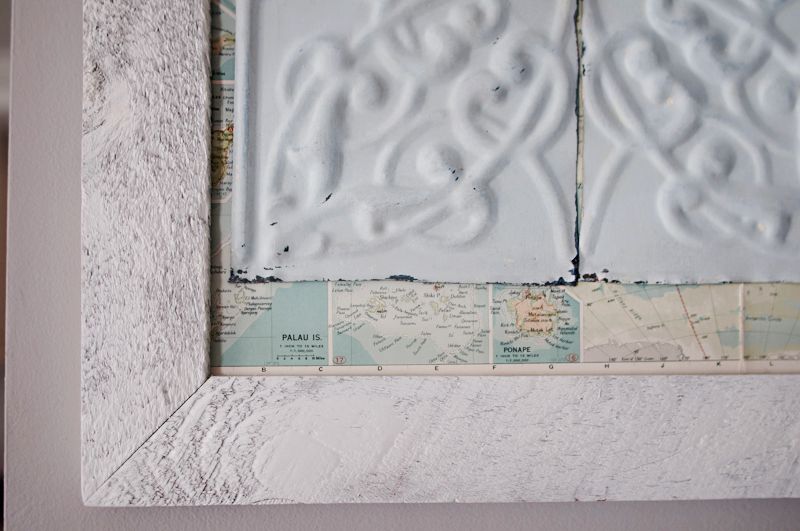
Let's start with the frame. I got mine from a Goodwill. It belonged in a dark wood paneled room from the '70s complete with a poor quality bird photo. I loved the grain in the otherwise ugly frame and used a thin paint to be sure not to hide the beauty of the texture.
After this, I pulled pages out of an old atlas to cover the frame backing. I chose pages based on how well the colors of the map went together. On my first attempt, I used spray adhesive to get them in place. However, I noticed later that this was not going to be strong enough to last with the ceiling tiles on top, and I had to go back and redo it. So my suggestion is NOT to mess with spray adhesive, but to try my second method- take a disposable brush and carefully brush a strong glue such a Gorilla glue onto the backing. It's important to brush it on since squirting the glue will cause the map to warp. Then carefully smooth the map over the brushed glue, and give it time to dry completely.
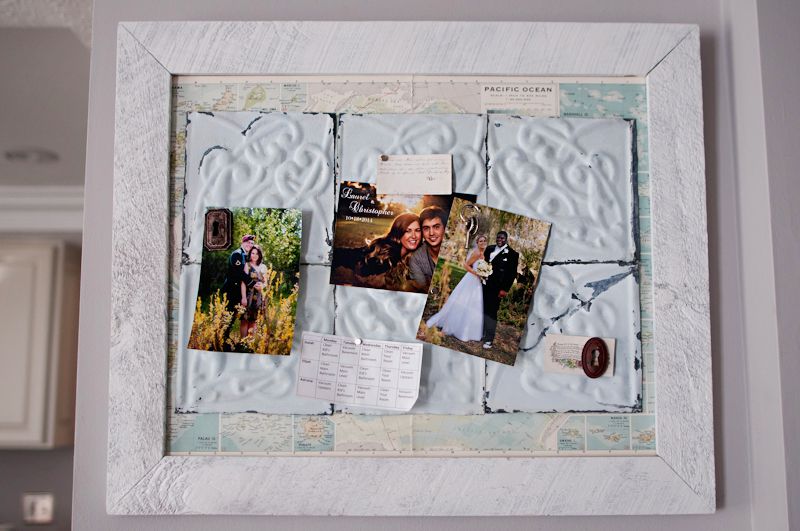
Once the map had dried on the frame backing, I put it back in it's freshly painted wooden frame. I used the same Gorilla glue (this time simply squirting it) to secure the ceiling tiles to the middle of the piece being sure not to put too much glue around the edges to avoid it bleeding into visible areas. The way you choose to arrange the tiles totally falls to your artistic preferences- do you want a lot of the map showing or just a little...do you want large area of tiles or just a strip?
One note: It's important to use tin ceiling tiles since they are actually magnetic.
Be sure to let this dry completely while laying flat.

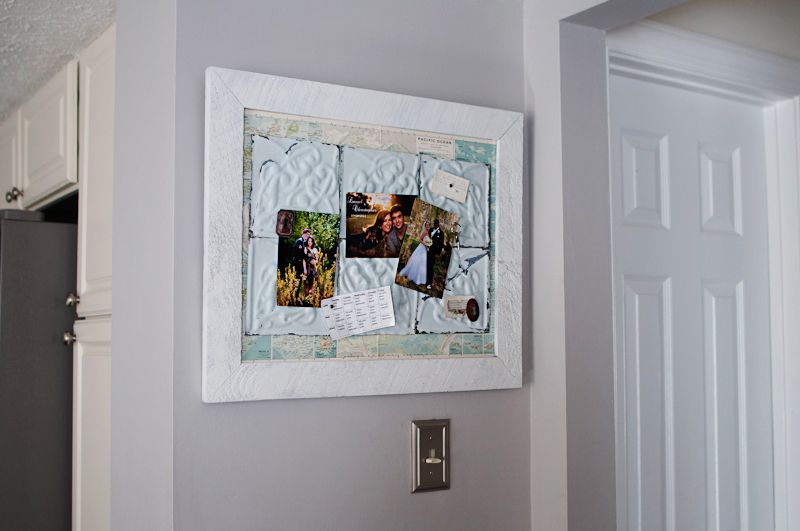
Now your new magnet board is complete.
And it's not just your new magnet board, but your new piece of art!
*Deep breath*
Okay, just to clarify this DIY will have nothing to do with Sharpies. Instead, let's focus on all thing white and pretty and mappy (we'll pretend that's a word).

Ready to do this? Here's what you'll need:
-a large frame complete with backing
-tin ceiling tiles (I got my antique ones off ebay for a reasonable price. Check HERE for some that are being sold right now.)
-a map or pages out of an atlas
-a very strong adhesive such as Gorilla glue
Let's start with the frame. I got mine from a Goodwill. It belonged in a dark wood paneled room from the '70s complete with a poor quality bird photo. I loved the grain in the otherwise ugly frame and used a thin paint to be sure not to hide the beauty of the texture.
After this, I pulled pages out of an old atlas to cover the frame backing. I chose pages based on how well the colors of the map went together. On my first attempt, I used spray adhesive to get them in place. However, I noticed later that this was not going to be strong enough to last with the ceiling tiles on top, and I had to go back and redo it. So my suggestion is NOT to mess with spray adhesive, but to try my second method- take a disposable brush and carefully brush a strong glue such a Gorilla glue onto the backing. It's important to brush it on since squirting the glue will cause the map to warp. Then carefully smooth the map over the brushed glue, and give it time to dry completely.

Once the map had dried on the frame backing, I put it back in it's freshly painted wooden frame. I used the same Gorilla glue (this time simply squirting it) to secure the ceiling tiles to the middle of the piece being sure not to put too much glue around the edges to avoid it bleeding into visible areas. The way you choose to arrange the tiles totally falls to your artistic preferences- do you want a lot of the map showing or just a little...do you want large area of tiles or just a strip?
One note: It's important to use tin ceiling tiles since they are actually magnetic.
Be sure to let this dry completely while laying flat.

Now your new magnet board is complete.

And it's not just your new magnet board, but your new piece of art!

Tuesday, March 11, 2014
Simple Curtain Rod Upgrade {DIY}
When you move into a house, there are so many hidden costs; but I've found none so painful as window treatments. You ignore your whole new set of glass panes for a week or two as you unpack. Then one evening you're smooching with your man on the couch, and in that moment your lack of window covering suddenly receives your full attention. You're online the next morning, determined to get those suckers covered. You find yourself choking on your coffee. They want HOW much to put some fabric over a few square feet?!? (You can see why I turned to DIY treatments when we moved to a lovely spot with 19 windows.) Then, oh-no-it's-not-over, you need the hardware- rods, blinds, shades- my wallet is choking.
There are so many ways to tackle the issue; but in this post, I'm sticking to curtain rods.
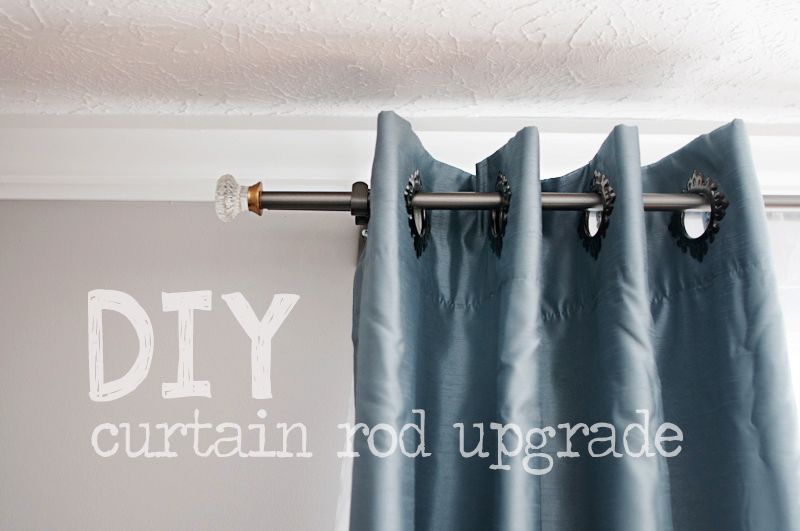
For my family room I needed a double bracket rod. So here's what I did- I bought some simple, standard ones at JCPenney. You can find the ones I got HERE. The ends easily popped off.
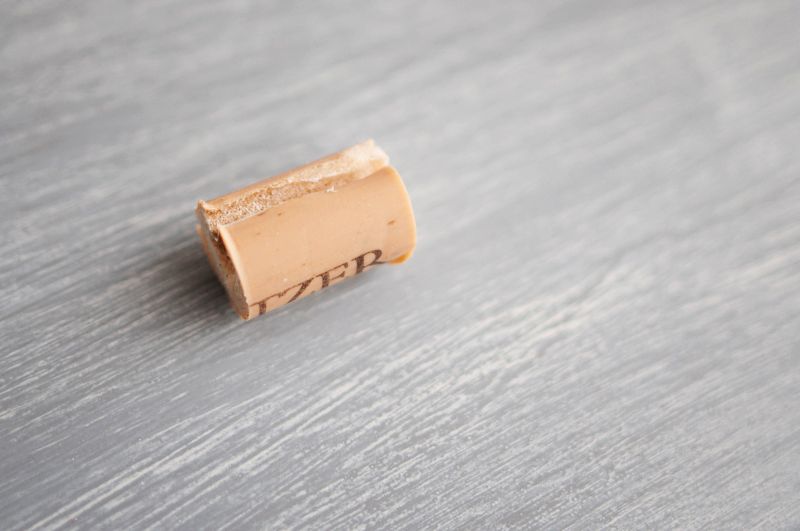
Next I took a cork from a wine bottle...I guzzled the wine and felt so much better about the cost of the curtains...joking, joking. Where was I? *ahem* Oh, yes, so I took an exact-o knife and cut a space out of the middle so that cork would then fit very snugly in the hallow end of the curtain rod. If your rod is big enough, you probably can use an untouched cork.
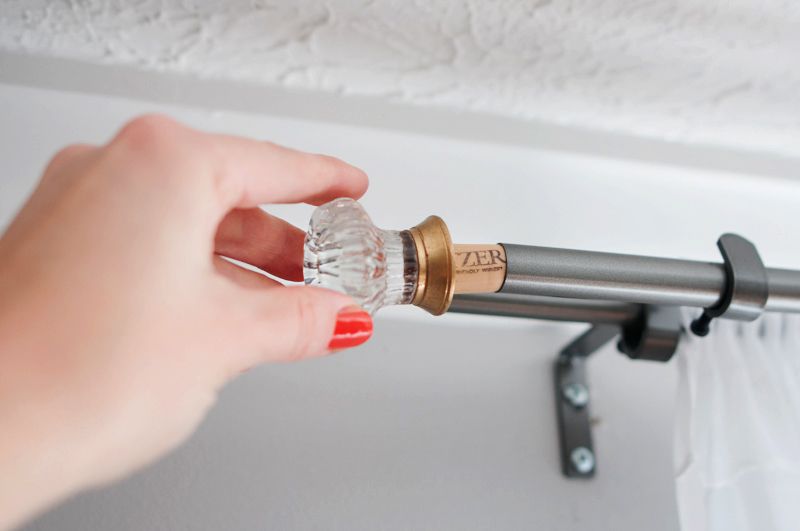
Then I took some large door pull knobs that I had gotten at Anthropologie's sale rack. The fun thing about this is that you could go in so many directions depending on which knobs you choose. You could pick a great shape or one with quartz or even an animal- something to perfectly suit your decor! Just be sure the knob base is wide enough for the project.
So then, I put the knob screw through the cork.
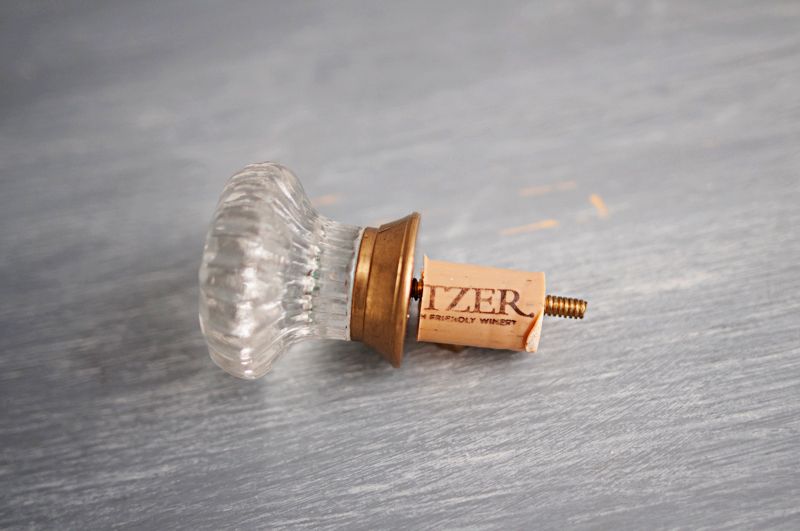
Then I attached the nut with a washer to keep it sturdily in place. (That washer is the key; so don't skip it!)
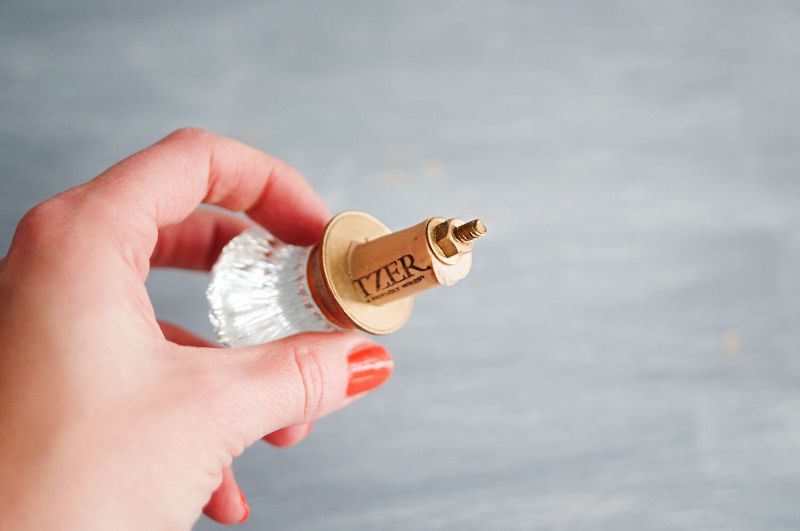
Simply place the cork inside the rod.
Now it just doesn't get any easier than that!
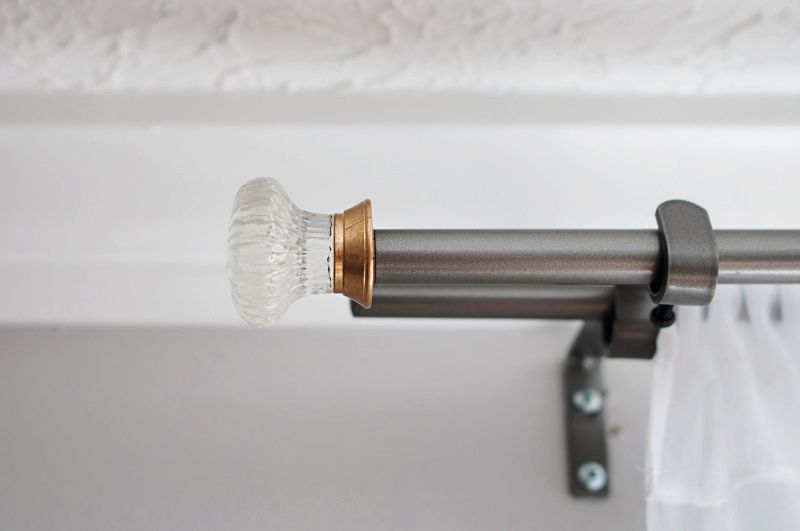
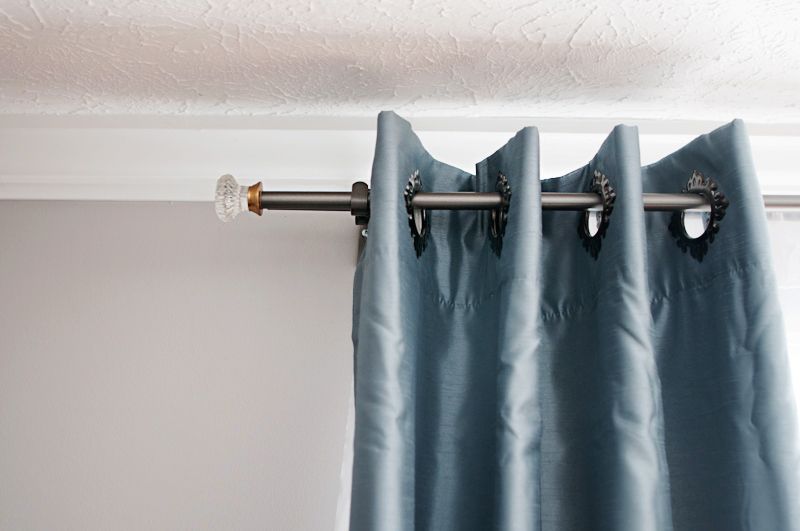
Beautiful, easy, and best of all- a fraction of the price of a fancy curtain rod.
There are so many ways to tackle the issue; but in this post, I'm sticking to curtain rods.

For my family room I needed a double bracket rod. So here's what I did- I bought some simple, standard ones at JCPenney. You can find the ones I got HERE. The ends easily popped off.
Next I took a cork from a wine bottle...I guzzled the wine and felt so much better about the cost of the curtains...joking, joking. Where was I? *ahem* Oh, yes, so I took an exact-o knife and cut a space out of the middle so that cork would then fit very snugly in the hallow end of the curtain rod. If your rod is big enough, you probably can use an untouched cork.

Then I took some large door pull knobs that I had gotten at Anthropologie's sale rack. The fun thing about this is that you could go in so many directions depending on which knobs you choose. You could pick a great shape or one with quartz or even an animal- something to perfectly suit your decor! Just be sure the knob base is wide enough for the project.
So then, I put the knob screw through the cork.

Then I attached the nut with a washer to keep it sturdily in place. (That washer is the key; so don't skip it!)

Simply place the cork inside the rod.

Now it just doesn't get any easier than that!

Beautiful, easy, and best of all- a fraction of the price of a fancy curtain rod.

Friday, March 7, 2014
DIY's coming
Hey, blog peeps, it's been a full week; so you only get a simple sweet photo of baby.
But fun stuff is coming! In the next two weeks, you can expects some DIY posts on:
Stay tuned!!

But fun stuff is coming! In the next two weeks, you can expects some DIY posts on:
- how to make a fabulous magnet board with maps and ceiling tiles
- how to spruce up a little corner with simple mason jars
- how to use door knobs to dress up simple curtain rods with one simple trick
Stay tuned!!

Friday, February 28, 2014
A Peek Into Our Home {craft/office room}
As I stated in my last Peek Into Our Home post, I simply never remember to take the "before" picture. This is truly sad since if I ever needed a before photo to show off some drama, it was for this room. "Mommy's Craft/Office" room became the junk room over the last 20 months of us living in this house. It was a full-on "catch all" with very little rhyme or reason. When I would get a photography order, I would go into this cesspool and dig out what I needed. When I would get ready for a photo session, it was like a game of find-the-needle-in-the-haystack. Each time I would promise this room that it had it's day coming.
January. That was month I had designated as D-Day for the for the office. So on January 2nd, before school started back up, I drug all four kids down to Ikea by myself. When we made it through the maze and to the check-out aisle, I couldn't help but to blurt out loud, "I feel like Super Woman right now!!" THIS is why they give you the option of buying frozen yogurt cones after you check out- a station that should be renamed "Reward Central".
So here's Mommy's new space. It's in the basement, so you'll have to forgive the lighting.
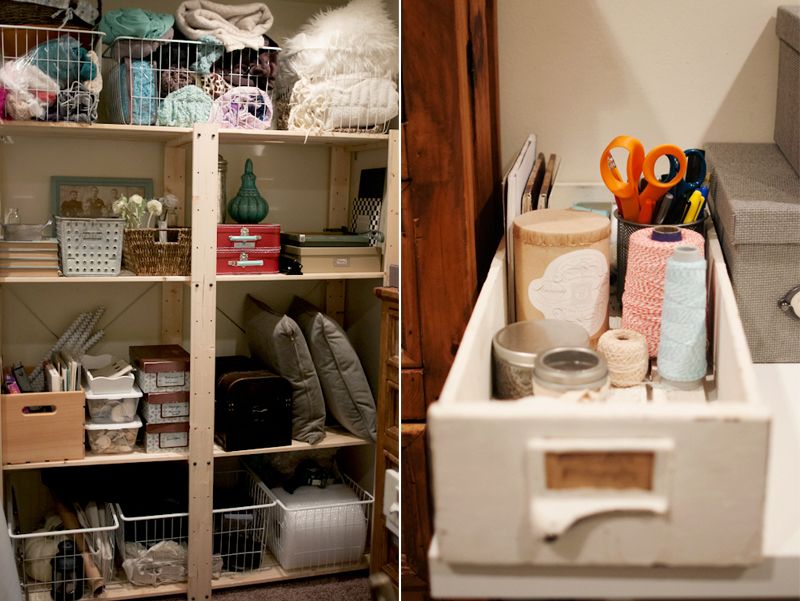
The pine shelving, white tables, and rug are all from Ikea. (And yes, that is my wedding dress.)
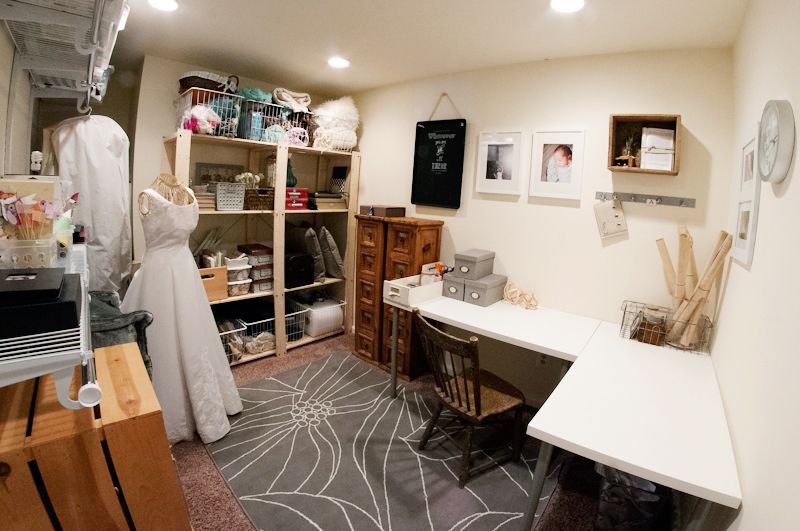
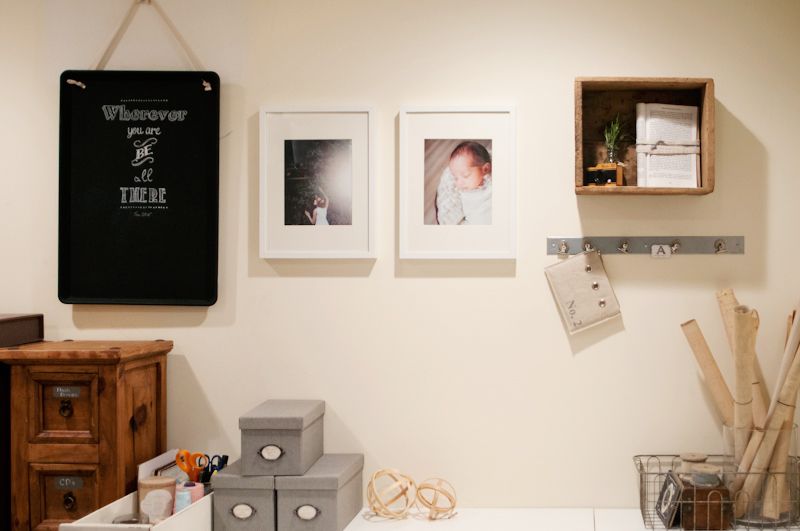
Those large baskets to hold all my newborn photo props were only $6 at Ikea...lovin' it.
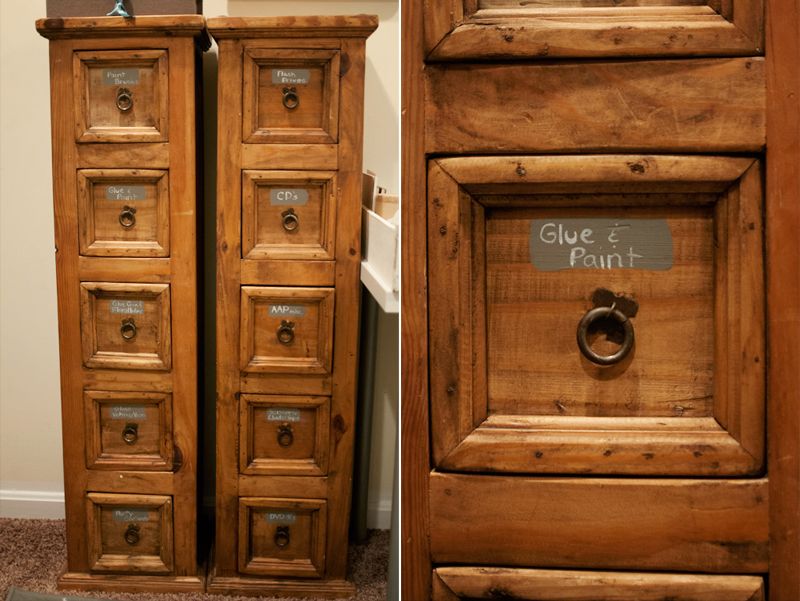
These drawers were from my dear friend Emma who is about to move to Japan (sob!). I used some chalkboard paint to make labels for each drawer.
The chalkboard is actually an old baking sheet that I sprayed with chalkboard paint- easy, peasey.
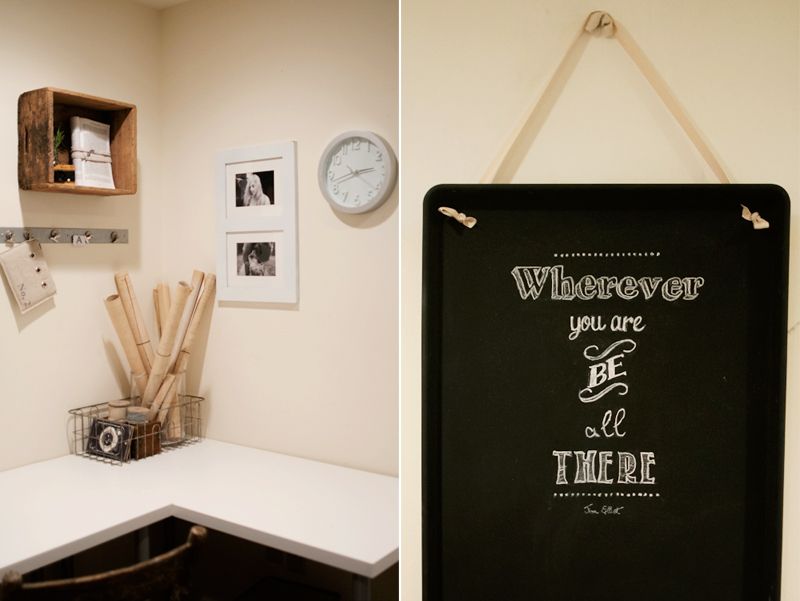
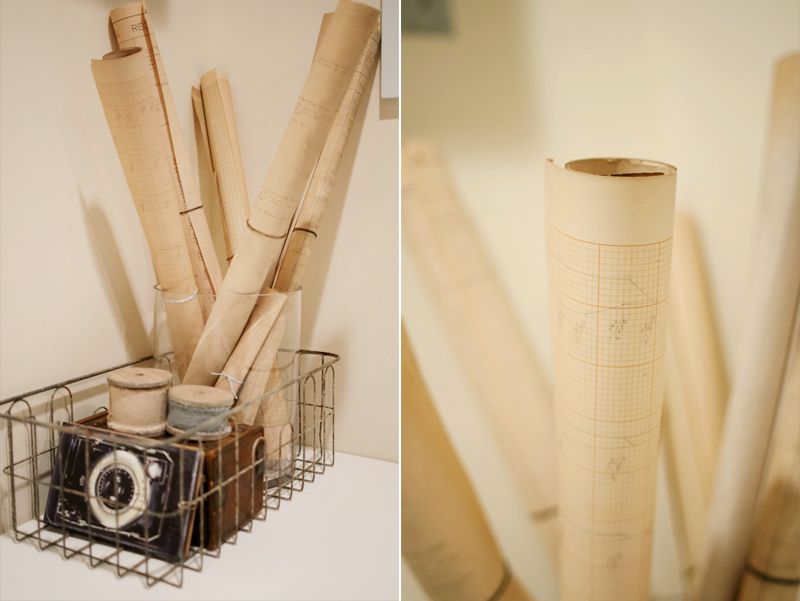
Aren't those old graph papers divine!?! I grabbed them at a vintage shop in Oregon for 50 cents a piece! (Remind me why I don't live in Oregon, again?)
Storage boxes from Ikea...
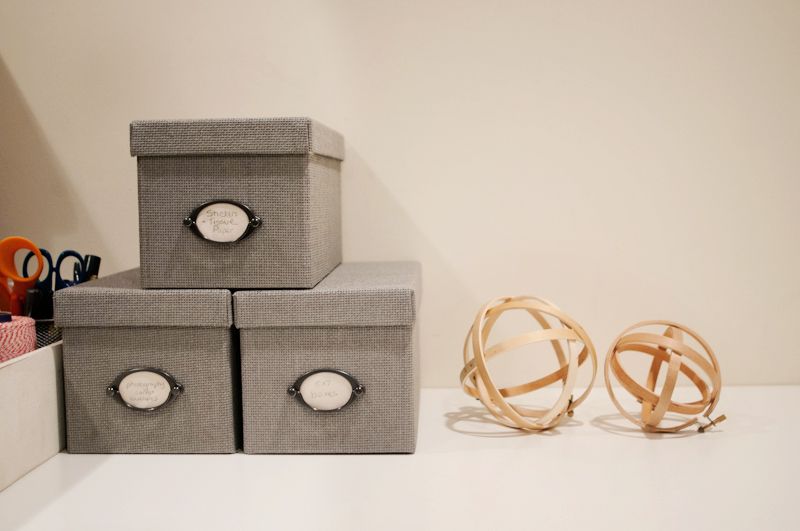
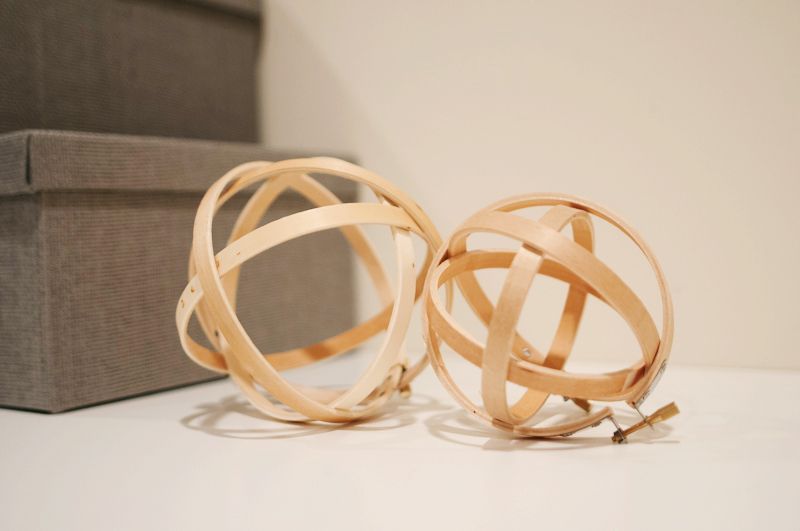
These fun spheres were simple to make out of embroidery hoops. You can find the tutorial at Hill Country Homebody.
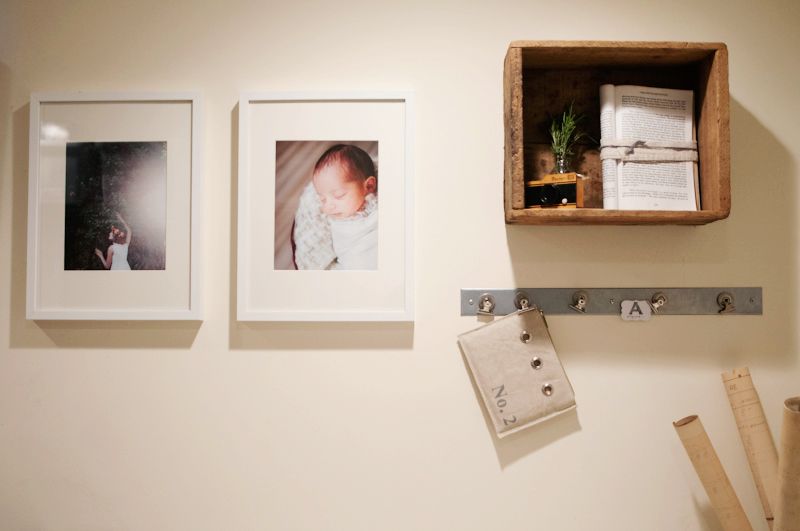
The magnetic strip was from Ikea and the shelf is simply and old crate attached on its side to the wall.
And can I just tell you the glories of walking into a room to do a quick job and knowing where everything can be found! Or sitting down for a longer job and leaving the unfinished product to come back later! After years of living in small spaces, I know what a luxury this is.
Have a great weekend, y'all!
January. That was month I had designated as D-Day for the for the office. So on January 2nd, before school started back up, I drug all four kids down to Ikea by myself. When we made it through the maze and to the check-out aisle, I couldn't help but to blurt out loud, "I feel like Super Woman right now!!" THIS is why they give you the option of buying frozen yogurt cones after you check out- a station that should be renamed "Reward Central".
So here's Mommy's new space. It's in the basement, so you'll have to forgive the lighting.
The pine shelving, white tables, and rug are all from Ikea. (And yes, that is my wedding dress.)


Those large baskets to hold all my newborn photo props were only $6 at Ikea...lovin' it.

These drawers were from my dear friend Emma who is about to move to Japan (sob!). I used some chalkboard paint to make labels for each drawer.

The chalkboard is actually an old baking sheet that I sprayed with chalkboard paint- easy, peasey.

Aren't those old graph papers divine!?! I grabbed them at a vintage shop in Oregon for 50 cents a piece! (Remind me why I don't live in Oregon, again?)

Storage boxes from Ikea...

These fun spheres were simple to make out of embroidery hoops. You can find the tutorial at Hill Country Homebody.

The magnetic strip was from Ikea and the shelf is simply and old crate attached on its side to the wall.

And can I just tell you the glories of walking into a room to do a quick job and knowing where everything can be found! Or sitting down for a longer job and leaving the unfinished product to come back later! After years of living in small spaces, I know what a luxury this is.
Have a great weekend, y'all!
Tuesday, February 25, 2014


Friday, February 21, 2014
A Peek Into Our Home {guest bedroom}
It's been a long while since I've done a "Peek Into Our Home" post, but I'll be trying to get a couple up in the next few weeks along one or two simple tutorials.
So today let's peek into our guest bedroom that happens to also be the room of a long-standing "guest". My sweet sister, Hannah has lived with us for a couple years now. She will most likely be moving out at the end of the summer which will be tearful for all of us. Knowing this and also upon her request, I took over the decorating of this room.
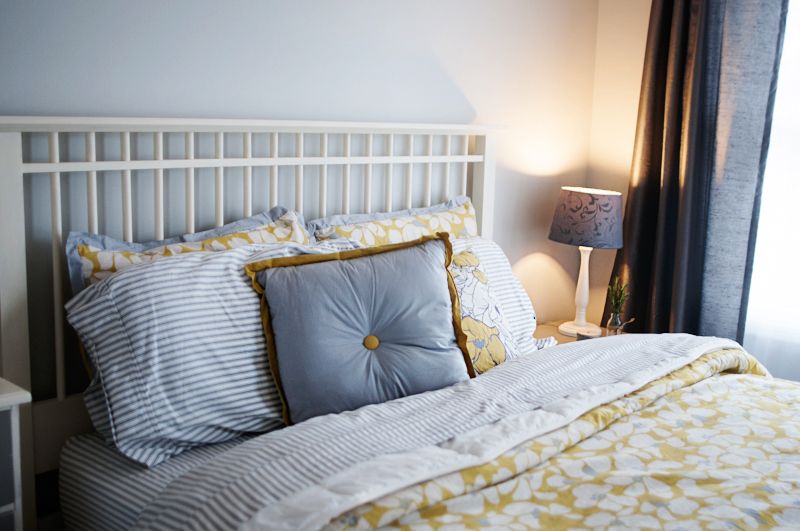
My policy when redo-ing a bedroom is to keep the bedspread/comforter I've chosen in mind but NOT to decorate around it. The problem in getting so caught up "matching" the room to one piece is that when you've grown out that bed covering, you are forced to redo a whole room. Trust me, I've done hideous things like an time-intensive, striped lilac painted room designed around one silly comforter. When I changed my mind, I was stuck with those purple stripes until I convinced my husband to give up a weekend to help me paint the whole thing over. INSTEAD I've started designing a room I love with neutral pieces. You'll see that in this room where I chose grey and cream as the base color- a hundred different bed coverings would look gorgeous with this design.
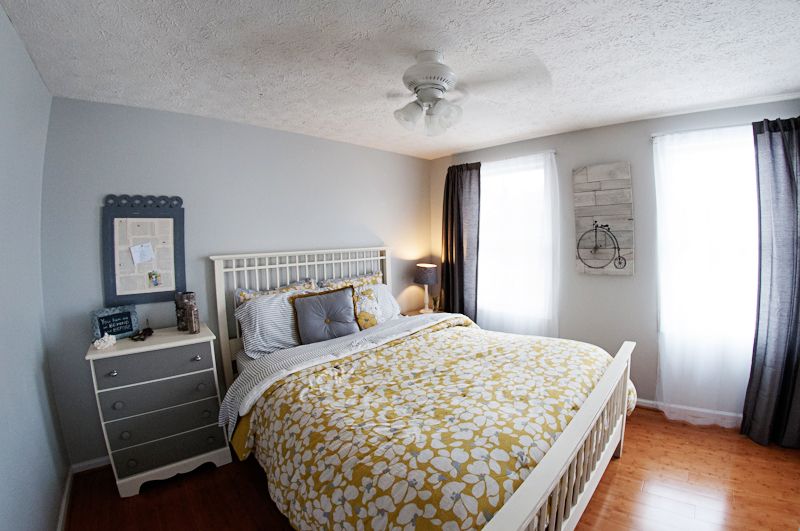
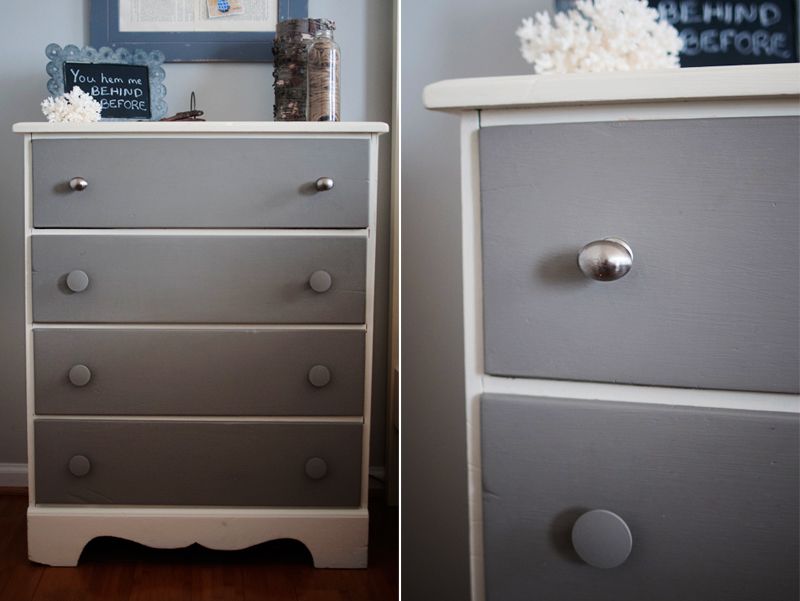
This dresser was a $5 steal at a yard sale. I'm terrible about remembering to take "before" photos, but picture a dumpy old wooden dresser. I painted the main part of the dresser with Annie Sloan Chalk Paint in the Old White. Then the drawers were done in the French Linen color. The contrasting colors make this more of stand-out piece. I simply painted the original wooden drawer pulls in the French Linen, but decided on chrome pulls for the top drawer for some extra interest.
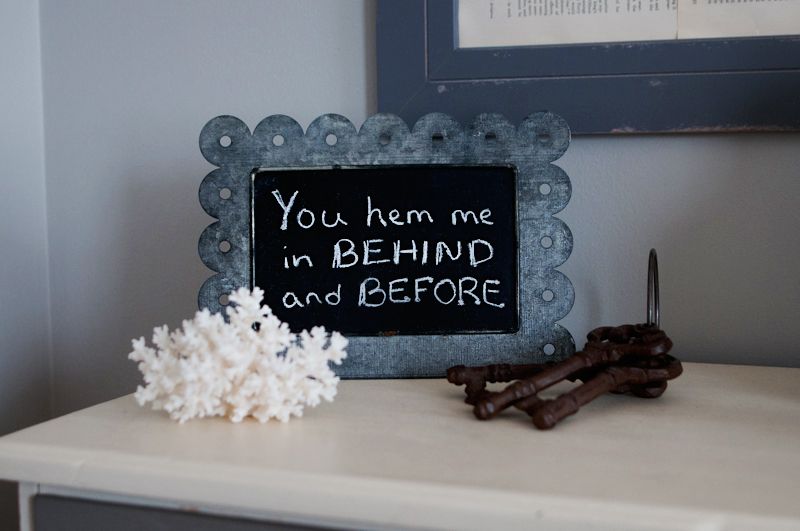
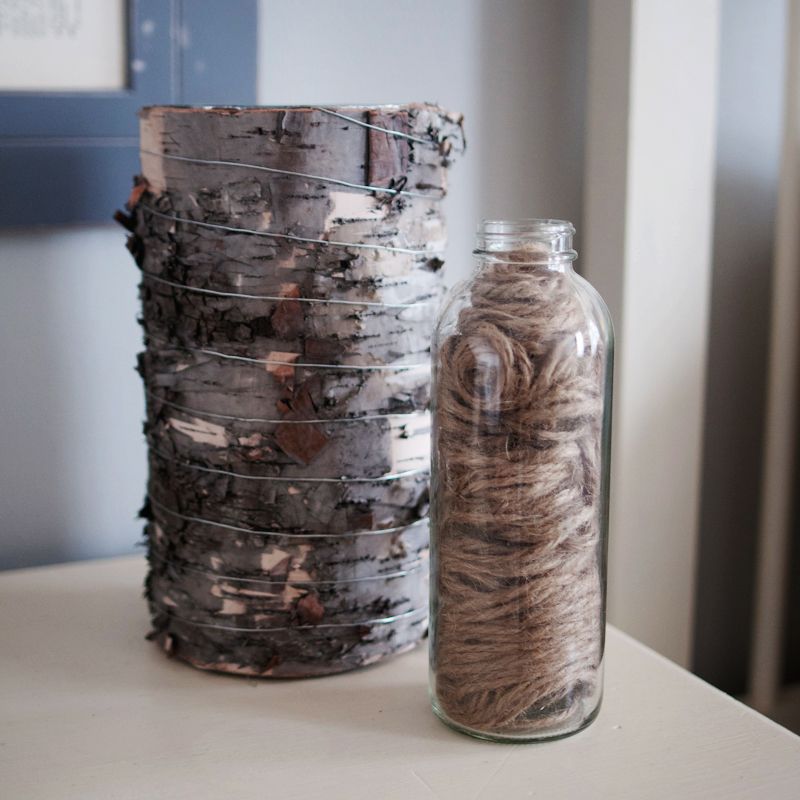
Psssst...secret. This glass bottle was an iced tea bottle that I rescued from the recycling bin and filled with some fat twine I had on hand. The bark vase and the above chalk board both come from an addicting little website full of inexpensive items called Save On Crafts.
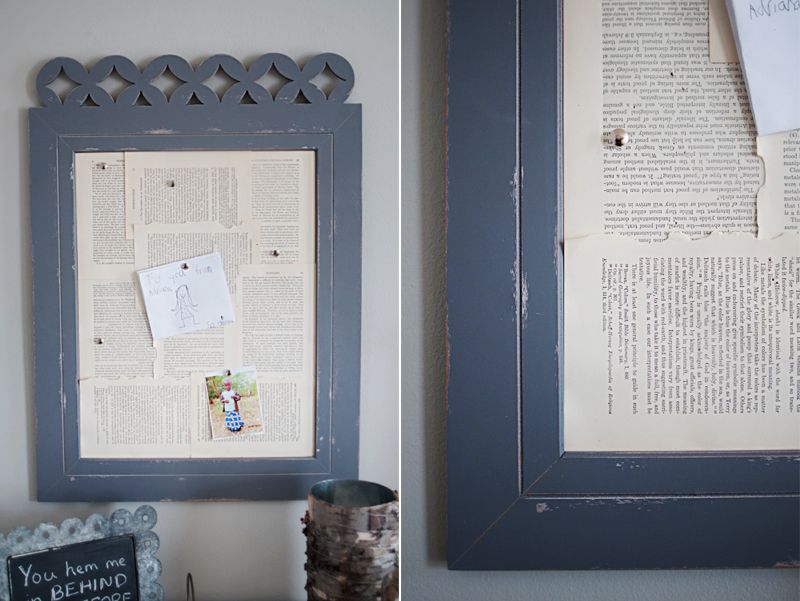
The push-pin board was a score from Home Goods. It was just plain cork inside; but when I'm not hanging books on the wall, I'm pulling them apart. I took pages torn out of a book from a garage sale and used some adhesive to cover the board.
My sister helped me by painting the wooden bed frame we've owned forever in the Old White I mentioned before (with Annie Sloan wax to protect it). It made the piece so dreamy and beauty, but she probably wanted to shoot me after having to do each of those rails.
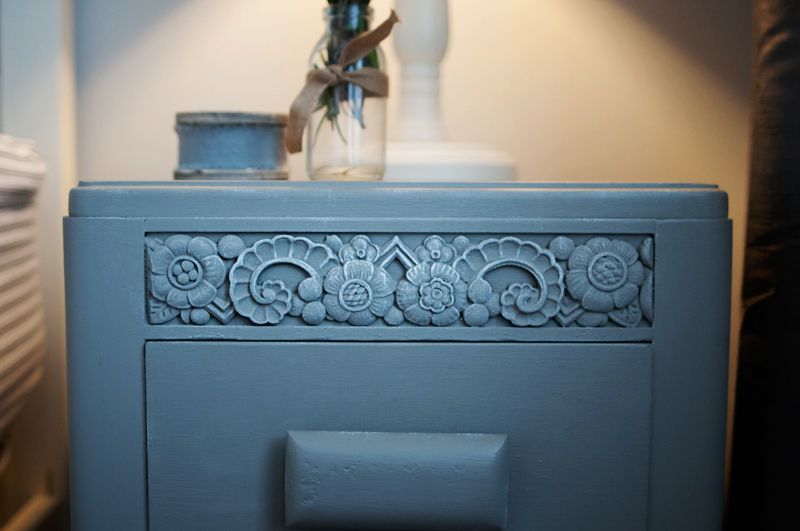
This little nightstand was actually once a side piece of an antique vanity. I'm smitten with it.
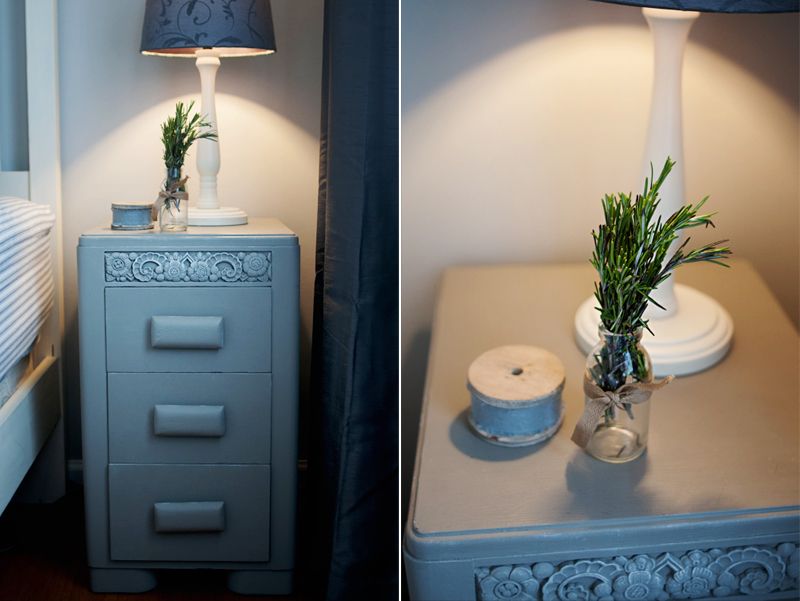
After painting it in the French Linen, I used a dry brush with the tiniest bit of Old White on it to brush over the wood design so that it would stand out more. Aren't the details devine!?
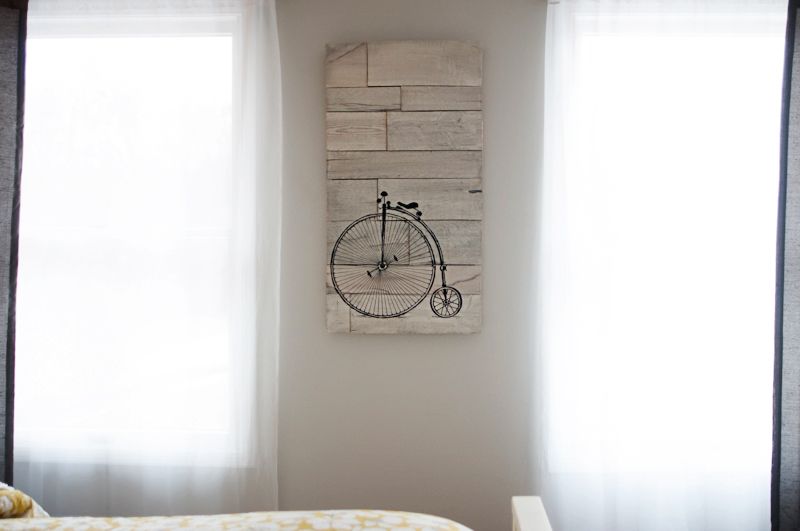
I already blogged about how to make this little DIY pallet art. You can find that HERE.
A little space turned little haven. As always, feel free to post your room redo's in the comments since who doesn't love to peek into someone's space!
Happy Friday, friends!
So today let's peek into our guest bedroom that happens to also be the room of a long-standing "guest". My sweet sister, Hannah has lived with us for a couple years now. She will most likely be moving out at the end of the summer which will be tearful for all of us. Knowing this and also upon her request, I took over the decorating of this room.
My policy when redo-ing a bedroom is to keep the bedspread/comforter I've chosen in mind but NOT to decorate around it. The problem in getting so caught up "matching" the room to one piece is that when you've grown out that bed covering, you are forced to redo a whole room. Trust me, I've done hideous things like an time-intensive, striped lilac painted room designed around one silly comforter. When I changed my mind, I was stuck with those purple stripes until I convinced my husband to give up a weekend to help me paint the whole thing over. INSTEAD I've started designing a room I love with neutral pieces. You'll see that in this room where I chose grey and cream as the base color- a hundred different bed coverings would look gorgeous with this design.

This dresser was a $5 steal at a yard sale. I'm terrible about remembering to take "before" photos, but picture a dumpy old wooden dresser. I painted the main part of the dresser with Annie Sloan Chalk Paint in the Old White. Then the drawers were done in the French Linen color. The contrasting colors make this more of stand-out piece. I simply painted the original wooden drawer pulls in the French Linen, but decided on chrome pulls for the top drawer for some extra interest.


Psssst...secret. This glass bottle was an iced tea bottle that I rescued from the recycling bin and filled with some fat twine I had on hand. The bark vase and the above chalk board both come from an addicting little website full of inexpensive items called Save On Crafts.

The push-pin board was a score from Home Goods. It was just plain cork inside; but when I'm not hanging books on the wall, I'm pulling them apart. I took pages torn out of a book from a garage sale and used some adhesive to cover the board.

My sister helped me by painting the wooden bed frame we've owned forever in the Old White I mentioned before (with Annie Sloan wax to protect it). It made the piece so dreamy and beauty, but she probably wanted to shoot me after having to do each of those rails.

This little nightstand was actually once a side piece of an antique vanity. I'm smitten with it.

After painting it in the French Linen, I used a dry brush with the tiniest bit of Old White on it to brush over the wood design so that it would stand out more. Aren't the details devine!?

I already blogged about how to make this little DIY pallet art. You can find that HERE.

A little space turned little haven. As always, feel free to post your room redo's in the comments since who doesn't love to peek into someone's space!
Happy Friday, friends!
Friday, February 7, 2014
Dear Toddler Mommy
I've had this post in my head for weeks now; but after having one girlfriend describe a poop-painting episode in her home a couple days ago and another post the aftermath images of Valentine roses meet two-year-old son on Instagram this morning, it seemed like a good time to get this into a post.

Dear Toddler Mommy,
I'm no author or expert. But with my baby soon to be four, I'm past that time of my life but not so far past that my brain has clouded it into nostalgia. That's why I'm writing to you.
At Christmas, I spent time I spent with my sister who is living in the throes of toddler mothering. I have heard her remark on how unproductive she feels when she sees what I've done in a day. After a few days together I realized how much my life has changed, and the memories of what she was dealing with came flooding back.
So, Toddler Mommy, here's some things you need to remember:
1) Don't buy into the lie that this is supposed to be "fun" and that you must cherish every moment.
There are some precious-beyond-words, my-heart-is-going-explode-from-love, and giggle-filled moments in being a Toddler Mommy. Grab those moments and press them hard into your memory. They are a life-long treasure. But guess what? Those are moments, not overarching themes in the toddler years. Let's be honest, the overarching themes of those years are usual fits, colossal messes, and poop...lots of poop. Do you know where some of the beauty is in all of this? That we get to imitate Christ who saw us dirty and messy and loved us with a selfless, off-the-charts love. But no one said this was supposed to be fun.
2) No. It doesn't "fly by".
No matter how many sweet old ladies stop you in the grocery store and tell you that "it goes so quickly", don't buy it. My boys (only 14 months apart) were 2 and 3 for a decade. Well, that's how it felt. And I'm not yet senile enough not to remember it. When you're sitting at their high school graduation, it may seem like it went fast; but when you're in the middle of toddlerhood, each day feels so long and tedious. We all felt like that. Be free to know that's normal.
3) Don't compare your life to those of mothers ahead of you.
When you see a mom with more kids than you who seems to get so much done, and you wonder why you're still in your pjs making lunch while she's gotten her kids ready for the day, carted them to where they need to be, and looks like she actually put on make-up. Remember that her kids are old enough to dress themselves and pour cereal with milk (think of the glories!). Remember that she can actually shut the bathroom door when nature calls or even to put on some Maybelline. Remember that no one is dumping valuables or defecating in their pants...or in other places, Lord help us.
4) Don't compare yourself to other Toddler Mommies
Sure enough you have that one Toddler Mommy in your life. Your kids are the same age, and yet when you manage to make it to a play-date, you watch her child play like a calm little angel while you're peeling your kid off the ceiling. Her child forms words you didn't even know a two-year-old could put together: "yes" and "mommy". And you leave feeling like a failure. Listen to me. I was there. Oh was I there! But hear me: each mother has her own struggles. No one can fully understand your exact struggles. Except God. He knows exactly how you feel and your exact weakness. And He promises to "help you and...uphold you with His righteous right hand" He is the one steadying you.
5) This. Is. A. Season.
When I was in labor with my first child, I had to be on pitocin during part of it; and I staunchly refused to have epidural (stupid but true). The pain was so great that at one point I started hallucinating. I thought I was in a place of pain that I could never leave. I totally lost touch with the reality that labor would end.
This is a picture of the toddler years. At times, it seems so long and overwhelming that we forgot that it will end. Don't lose touch with the fact that your days do matter. You are sowing seeds right now; and while you might not see so much as a tiny little sprout, it's coming. Keep watering, sister.
6) Sit at Jesus' feet.
Remember those wonderful quiet times in God's Word that you had? Okay, so maybe it was two years ago, but remember it? Well, it probably won't look the same again for a long time. And that's okay. Did you hear me...that's okay! What's not okay is for you to be self-sufficient. Sit at Jesus' feet. It's not something on your to-do; it's your life source. Hear me carefully, I didn't say finish a Bible-in-a-Year plan. I said sit at Jesus' feet. Right now that means being resourceful. For a while my time with Jesus was when I sat outside my toddler's room trying to train him to stay in his big-boy bed (and this took so many flippin' weeks, people). I drank in a couple of verses...and popped the little stinker back in his bed...and drank in another verse...and...well you get the picture. Come to Him with your tears, your little victories, your frustrations. The Bible promises us that He cares. Can you even imagine!? The God of the universe cares for your personal mommy soul.


Friday, January 31, 2014
A Girl and Her Haircut
She's been begging for a chop for awhile now. I was skeptical but am a believer in their hair-their choice (except for my 3-year-old's desire to dye her hair pink). It turned out even cuter than I expected...big props to my friend Heather who's an artist with scissors.


Tuesday, January 28, 2014


Thursday, January 23, 2014
Cleaning Up My Coffee
I've written many times about how we've spent the past couple of years cleaning up our food. Whole foods in- chemicals out. For us this has been egged on by food allergies and just a simple growing awareness of what we put in our mouths.
But I held hard and fast to one thing...what went into this little cup each morning:
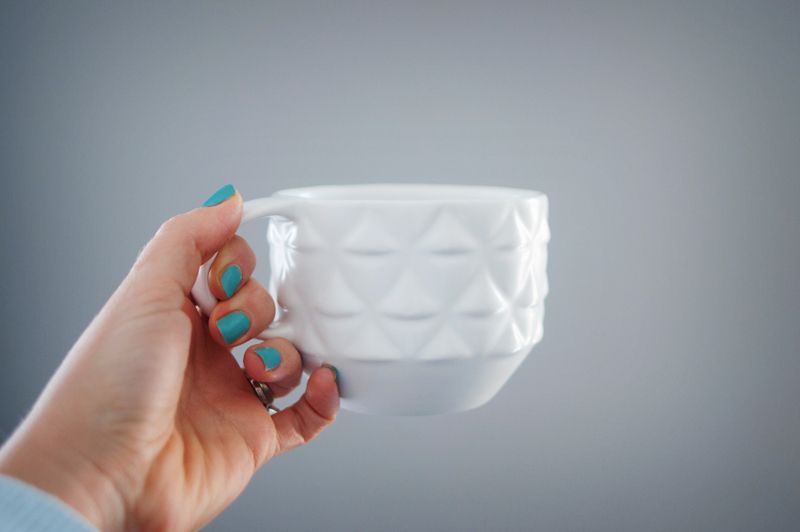
I take my coffee prep seriously. Very, very seriously. While my hubby has gotten himself to the point that he's content sipping on a quality black coffee, I was still pouring creamers with ingredients I couldn't pronounce and a healthy *cough* dose of aerosol whipped cream on top. A couple of my health-nut girlfriends teased me that while I was so worried about everything else we ate, I turned a blind eye to my daily intake of coffee additives.
I ignore it and them.
I think there's that one food in everyone's life where you feel like Gandalf on the bridge...

After a couple of years of intentionally not reading the ingredients, I caved and decided it was time to do something. Maybe it was the fact that I finally let the alarm bells go off in my head that my dairy creamer could last for about 2 months in my fridge before going bad. The stuff must have been practically embalmed.
Now don't get me wrong. I haven't turned into such a health snob that I won't touch that stuff when I'm a guest somewhere, the issue is that I was consuming it usually twice a day in my own home.
Then with some recent health issues, I've had to pull sugar almost totally out of my diet. The coffee plot thickened.
So I did some experimenting. Some suggested Stevia- I couldn't bring myself to get over the aftertaste. One girlfriend puts straight maple syrup in her coffee- that didn't work for me. One guy I know uses honey- a little piece of my coffee-diva died.
I'll spare you any more details, but I finally found that little happy place of whole food coffee heaven. It's simple really- organic heavy cream and pure maple syrup are the only two ingredients. Both are whole foods, and real maple syrup is a natural sugar that your body can process easily while having health benefits to boot.
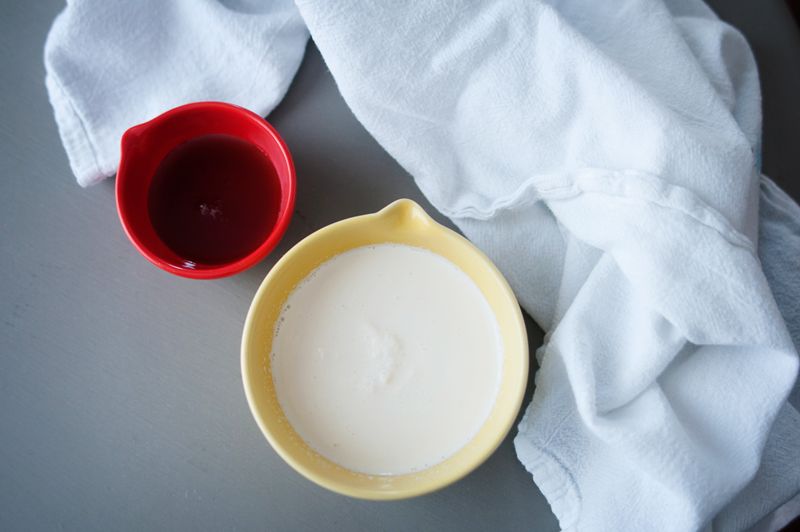
To make a batch of my "coffee happy place", I add:
This is totally subjective to your palette and how sweet you like it. You can also add a touch of vanilla or peppermint extract if you want to flavor it.
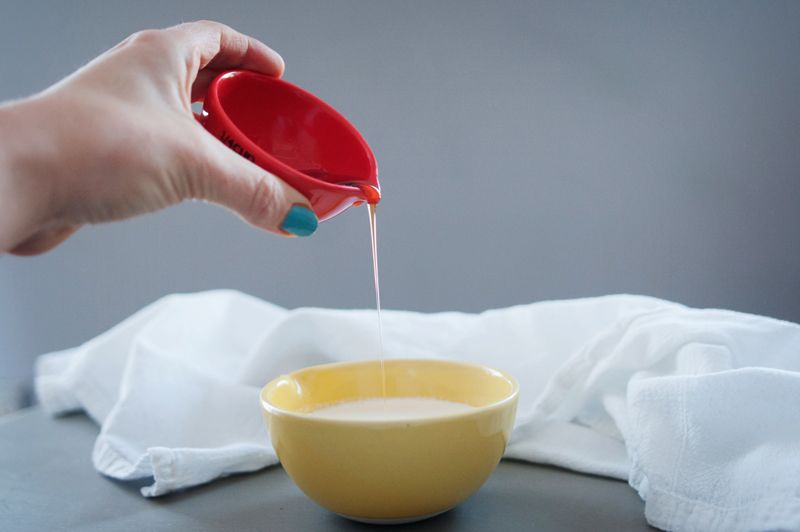
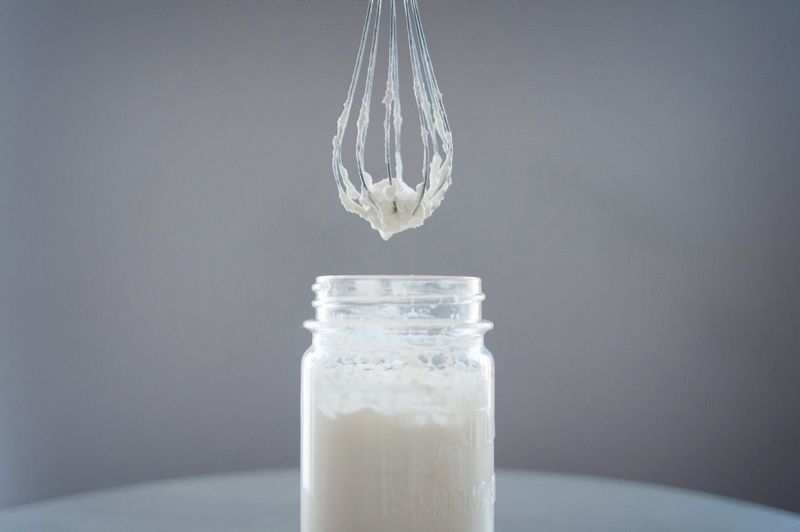
I whip it up with my hand mixer until it reaches that beautiful whipped cream consistency, able to make a little peak if lifted.
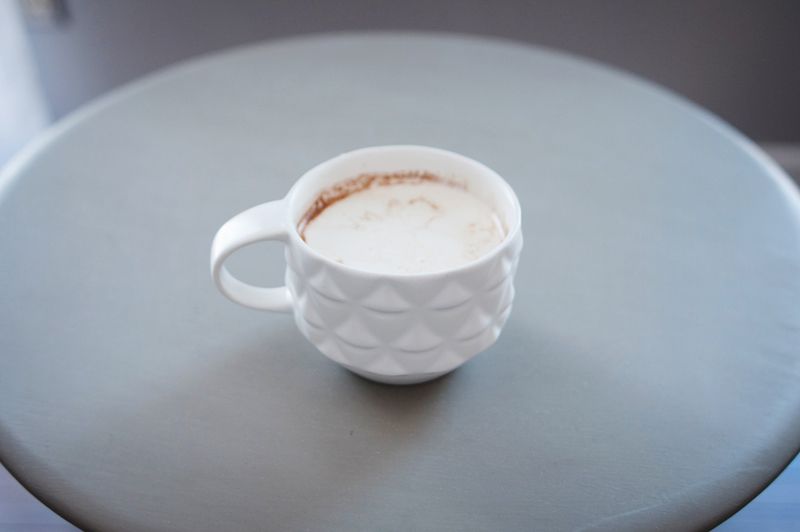
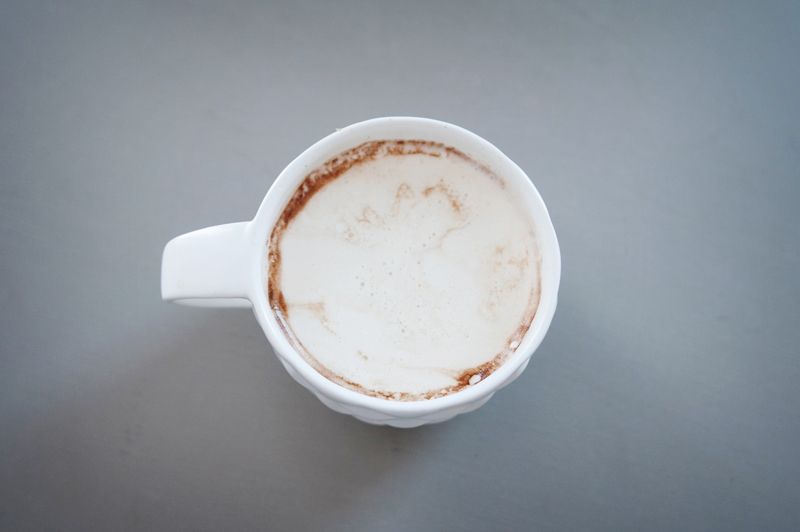
Then I add about 2 tablespoons of it to my cup of Joe to make this gorgeousness:
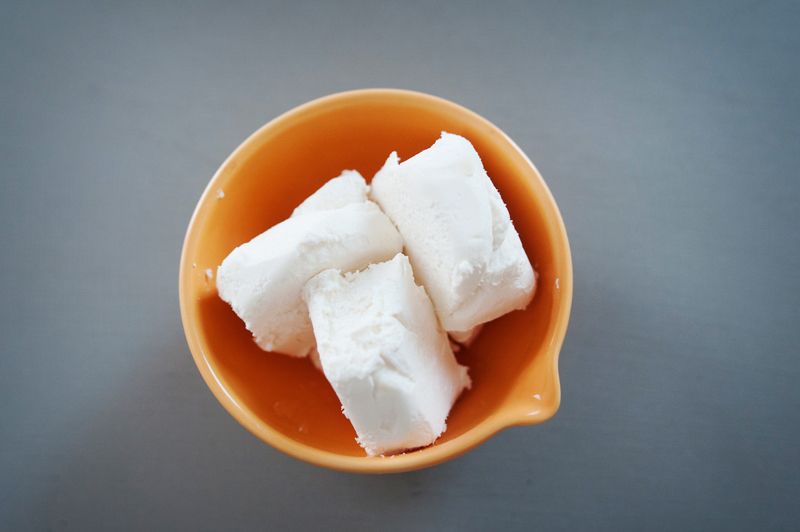
I take the rest and freeze in an ice cube tray. Then I can just pull out two cubes and pop it in my coffee in the morning.
Now my coffee is clean and delicious and wonderful and I may run away with it someday.
And all is well in war and peace.

But I held hard and fast to one thing...what went into this little cup each morning:

I take my coffee prep seriously. Very, very seriously. While my hubby has gotten himself to the point that he's content sipping on a quality black coffee, I was still pouring creamers with ingredients I couldn't pronounce and a healthy *cough* dose of aerosol whipped cream on top. A couple of my health-nut girlfriends teased me that while I was so worried about everything else we ate, I turned a blind eye to my daily intake of coffee additives.
I ignore it and them.
I think there's that one food in everyone's life where you feel like Gandalf on the bridge...

After a couple of years of intentionally not reading the ingredients, I caved and decided it was time to do something. Maybe it was the fact that I finally let the alarm bells go off in my head that my dairy creamer could last for about 2 months in my fridge before going bad. The stuff must have been practically embalmed.
Now don't get me wrong. I haven't turned into such a health snob that I won't touch that stuff when I'm a guest somewhere, the issue is that I was consuming it usually twice a day in my own home.
Then with some recent health issues, I've had to pull sugar almost totally out of my diet. The coffee plot thickened.
So I did some experimenting. Some suggested Stevia- I couldn't bring myself to get over the aftertaste. One girlfriend puts straight maple syrup in her coffee- that didn't work for me. One guy I know uses honey- a little piece of my coffee-diva died.
I'll spare you any more details, but I finally found that little happy place of whole food coffee heaven. It's simple really- organic heavy cream and pure maple syrup are the only two ingredients. Both are whole foods, and real maple syrup is a natural sugar that your body can process easily while having health benefits to boot.

To make a batch of my "coffee happy place", I add:
- 3 Tbsp. pure maple syrup
- 1 cup organic heavy cream
This is totally subjective to your palette and how sweet you like it. You can also add a touch of vanilla or peppermint extract if you want to flavor it.

I whip it up with my hand mixer until it reaches that beautiful whipped cream consistency, able to make a little peak if lifted.

Then I add about 2 tablespoons of it to my cup of Joe to make this gorgeousness:

I take the rest and freeze in an ice cube tray. Then I can just pull out two cubes and pop it in my coffee in the morning.

Now my coffee is clean and delicious and wonderful and I may run away with it someday.

And all is well in war and peace.

Subscribe to:
Posts (Atom)